

Hello guys, in the last PART of this article I prepared all the Hyper -V infrastructure and Azure for Disaster Recovery. In this part we will see how we test it in different ways
- Testing Failover On-Premises to Azure;
- Failover Planned On-Premises to Azure;
- Failover Planned Azure to On-Premises;
- Failover UnPlanned On-Premises to Azure;
- Failover UnPlanned Azure to On-Premises.
Setup process:
- VPN Site-to-Site and Point-to-Site (not required); (PART1)
- Configure Storage in Azure with some specifications; (PART1)
- DR settings in Azure; (PART1)
- VMM and Hyper-V Settings; (PART1)
- Virtual Machines Replicas; (PART1)
- Test failover and failback.
Testing Failover On-Premises à Azure
- Click on VM and do a Test Failover

- Check the Job:

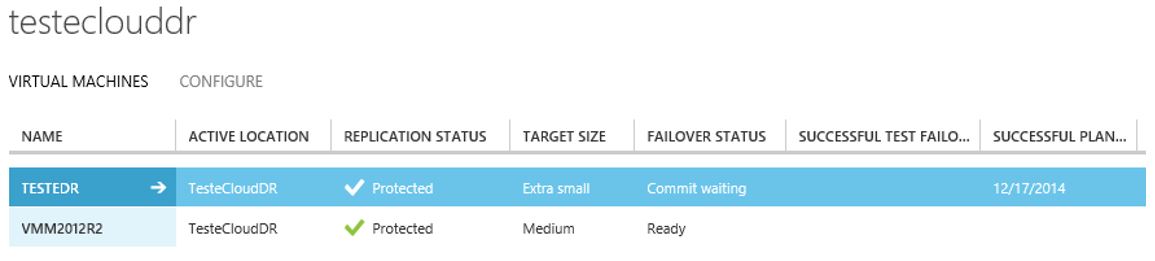
- Commit the Test:

- The VM Test is created on the Azure without an associated internal network. We only need external network to validate all tests:

- You can change the parameters of the VM and add the necessary Endpoints:

- After all the tests performed, Complete the Job:


- After the conclusion of all tests, the VM is deleted from Azure. The VM On-Premises is not changed in Failover Testing:

Failover
Planned On-Premises à Azure
- Click on VM and do a Planned Failover:

- View the Jobs in the Failover state:

- The Virtual Machine in the Source is stopped:

- Wait for the Job to complete:

- The virtual machine is created on the Azure:

- Commit the synchronizations where you can choose the Recovery Point that is intended:


- Create the necessary Endpoint (e.g. RDP) in Azure VM and test. The VM is on the internal Azure network that communicates with the VPN Site-to-Site:

- We were able to ping the VM in Azure from On-Premises:

Failover
Planned Azure à On-Premises
- Select the VM in Azure and click Planned Failover for On-Premises (you can synchronize before failover or during failover):

- Check the Job:

- Replication of the VM starts:

- After a few minutes click on Complete Failover:

- Wait until finish:

- Commit at the end:

- The VM is deleted from Azure and it's running On-Premises:

Failover UnPlanned On-Premises à Azure
- Disconnect the VMM Server and other VMs that are replicating:

- View the Jobs Running:

- Commit or Choose a Recovery Point
- The VM on Azure is available as in the previous case.
Failover
UnPlanned Azure à On-Premises
Only some Notes, because the process is the same as the previous:
- If you lose everything On-Premises and you need to make a Unplanned Failover for Azure and then a failback, this is not possible in an automated way.
- You must create a new VMM Server (or Restore) and re-register in Azure with the same name. You will need to re-create all the VMs in Hyper-V with the same name and ID.
- The easiest way is to download the Azure VHD to On-Premises (it can take some time, but it's the simple way).
- If we had a VMM Server replicated to Azure, but eliminated on-premises, it would be in this state:

- If we try the Planned Azure Failover for On-Premises you would have an error because there is no VHD for replication. If we try the Azure Unplanned Failover for On-Premises we would have an error because the virtual machine is not found. If we delete the VMM Server VM, we are deleting the Azure Replica and then all the replications are stopped.
See you next time!
Well written post. I appreciate your guidance for sharing about azure disaster recovery plan here. I really need to know about it. Great work!
ReplyDeleteThanks for reading. Hope it was helpful :)
DeleteRegards.